 Booting with Secure-Boot
This document describes booting Fatdog64 from a USB flash drive on a computer with UEFI and secure boot enabled. All Windows 8 computers onwards come with secure boot enabled by default. Secure boot can be disabled if you like in UEFI setup, and Windows will still boot normally.
At the time of this writing the UEFI implementations vary a lot. Some are easy to configure, some are not. Some only except keys that are added though the UEFI setup menu. Some are really just broken and won't recognize the keys that are added. Fortunately these are few and hopefully soon to be fixed.
Step 1: For most systems pressing F2 when the computer starts to boot will take you to the UEFI setup menu. Plug in your flash drive that has Fatdog64 installed, turn on the computer and press the F2 key to enter UEFI setup.

Go to the boot tab and move your USB drive to the top of the boot list so that the computer will try to boot from it first. Exit setup and save your changes. (Usually F10). On some UEFI implementations you won't have this option, but you will have an option to manually add a boot option. Some have both. If you need to manually add a boot option, you'll need to browse to /EFI/boot/bootx64.efi on the USB drive.
Step 2: When the computer reboots you should see a screen like this if it booted off the flash drive with secure boot enabled.
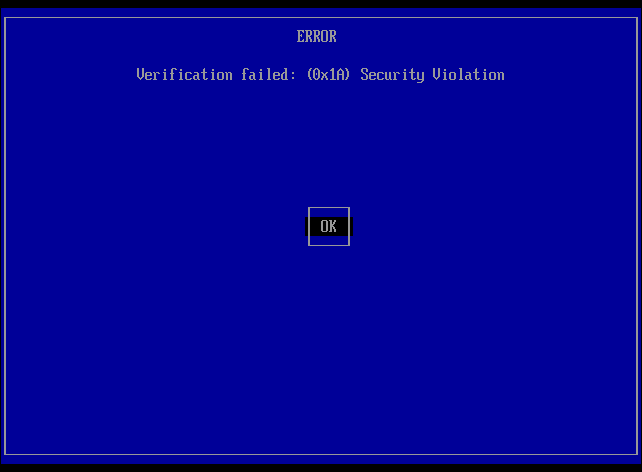
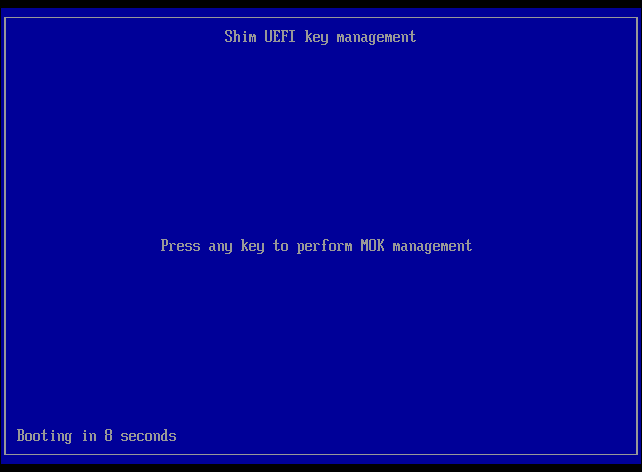
Press Enter key to go to the screen, and when the next screen shows up, press any key perform the "MOK Key Management" within the next 10 seconds.
If you fail to press a key in the next ten seconds, the boot will fail and you will have to power-down your computer and try again.
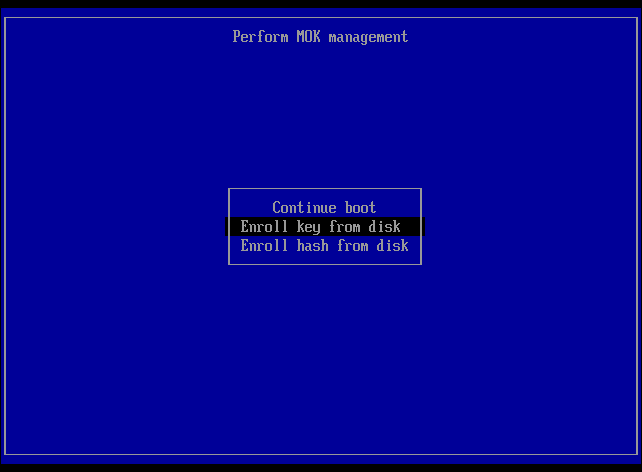
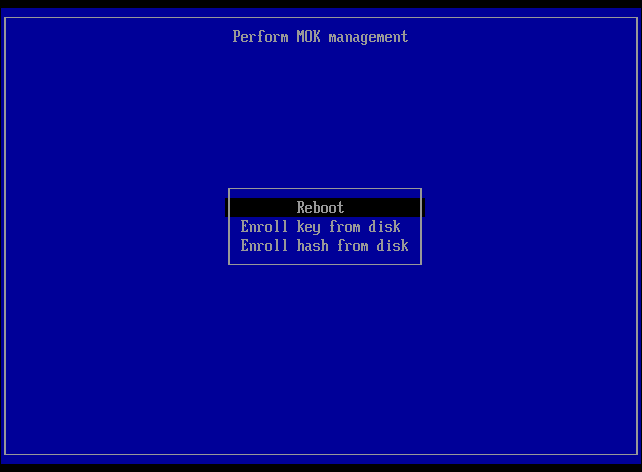
If you do it correctly, you will eventually see this screen. Use the arrow keys to move the selection bar and highlight "Enroll key from disk" and then press Enter.
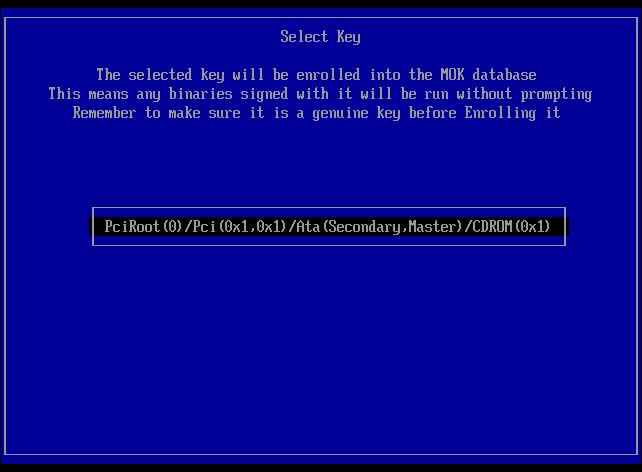
Step 3: Use the arrow keys to select the device/partition that contains the key and press Enter. It should be the one with 'USB' in it. The example screenshot below does not show anything with 'usb' in its name because it was taken from an emulator, but on a real machine you should see one that has it.
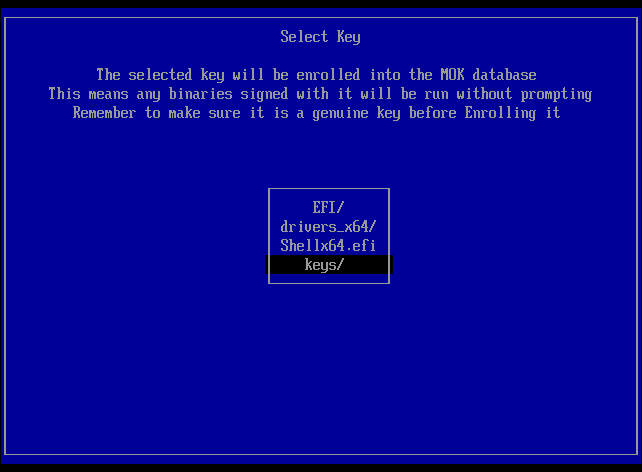
Step 4: Use the arrow keys to move the highlight bar to the 'keys' folder and press Enter. If you don't see a 'keys' folder you probably selected the wrong partition, press Esc to return to the previous screen and select a different partition.
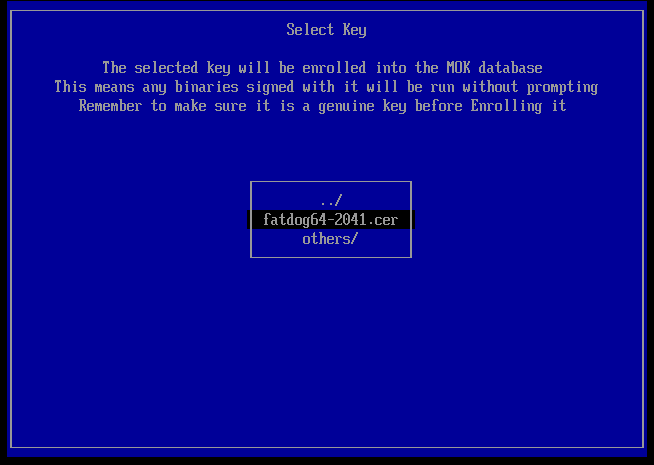
Step 5: Use the arrow keys to move the highlight bar to select 'fatdog64-2041.cer'. This is the Fatdog64 key. Then press Enter.
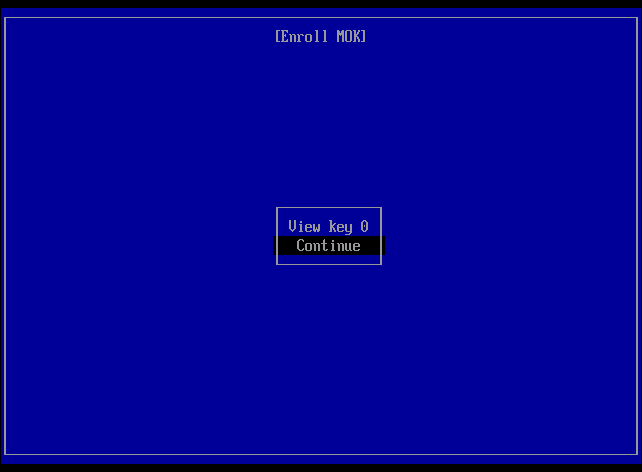
Step 6: The Next screen should look like below. Use arrow keys to move the highlight to "Continue" and then press Enter.
Step 7: On the Next screen move the highlight to "Yes" and press Enter.
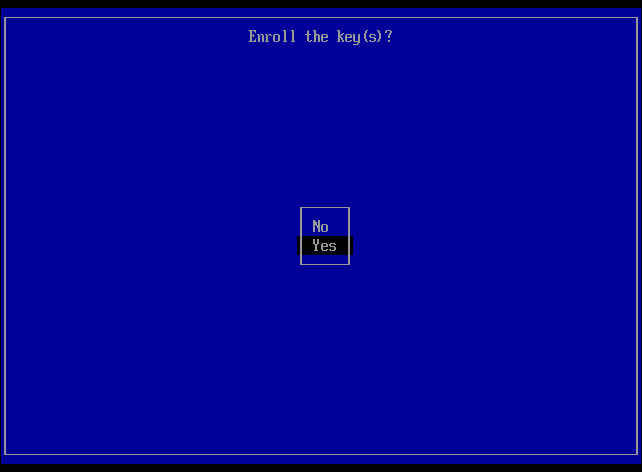
Then choose "Reboot" and press Enter.
Step 8: If everything is successful, the computer will be reboot and you will see Fatdog boot screen after it comes back. If it does not automatically reboot, you can just power it off manually, or press Ctrl-Alt-Del to reboot.
Final Note: Once the keys have been installed you won't be asked for them again. If for some reason you want to remove the Fatdog64 key, you can delete all the added keys (MOKs) by booting to the UEFI shell from rEFInd and typing
dmpstore -d MokListFinal Note 2: Secure Boot is a fickle thing. It does not always work. For example, on a Dell 14z with a 3rd generation I5, the boot would hang after the Grub2 boot selection. For this laptop I disabled secure boot then followed the UEFI hard drive install instructions. Then I re-enabled secure boot and it would boot fine from the hard drive install.